Isaiah

Landscaping design in Tucson

What are the Climate Factors for Your Landscape Design?

Are you looking forward to renovating your garden or beginning to design your landscape, but feeling confused about the climate factors to consider? If yes, you are at the right place. Sure enough, an appealing landscape in Tucson requires careful consideration of a bunch of climate and environmental factors. Here is a guide for you, that will help you understand these factors and provide you with practical tips. So that you can plan and design your landscape accordingly, and make your outdoor space a treat for your eyes! Table of Contents What are the Climate and Environmental Factors? Here is a list of climatic and environmental factors that influence the landscape in an area: Influence of Temperature  Every plant species has a certain temperature range, that is required for its optimal growth. When this range exceeds, it adversely affects the plant growth, and reduces its yield. Summers in Tucson are very harsh as the temperature goes above 100°F (38°C). Many plants are unable to bear this intense heat and so they die. It is therefore important to choose plants, that can tolerate extreme temperatures. Read More: How to Landscape a Steep Slope on a Budget  Precipitation  Tucson receives very little rainfall. Hence moisture content in the soil is very low. To design your landscape, you should look for plants that require little water to stay hydrated.  Natural Energy: Sunlight There are two types of plants. Ones that are sun-loving and require extreme heat to sustain. While the second category is shade-loving plants. These plants need to be protected from the sun. You can do this by placing them under canopies or structured shades. Read More: Landscape Ideas for Creating Privacy  Soil Type  The growth of a plant depends on how well the soil is beneath it. The amount of minerals present in the soil, and the moisture content within it, decides the quality of the soil. Tucson’s soil is generally rocky and less fertile. You may consider adding organic matter and fertilizers to improve the soil quality. Better the soil type, better the landscape! Wind   Tucson receives powerful winds during the spring season. Your landscape’s stability is at stake during this time as it is prone to getting affected by these strong winds. As they can cause erosion and damage your trees. It is crucial to plant windbreaks, such as dense shrubs or trees to reduce the wind speed. Microclimates You may change the atmospheric conditions of particular areas in your landscape by creating microclimates. This can be done by creating sun traps and sheltered spots for your plants. Their placements in the desired atmospheric conditions, will boost your plant growth and improve its overall health. This will make your landscape bloom with beauty! Understanding Tucson’s Desert Climate  Summers in Tucson are very hot while the winters are quite mild. Most of the year remains dry. The only rain it gets is during its monsoon season, between July and September. Considering these weather conditions, the plants appropriate for designing your landscape are drought and heat-tolerant.   Dealing with Temperature Extremes As you now know extreme temperatures reduce photosynthesis and increase water demand. Hence you might be wondering how to cope with it. For this sake, there are some mitigation techniques such as growing heat-tolerant plants, creating shade with structures or larger plants, and selecting plants with varying dormancy periods, to help you deal with extreme temperatures.  Adapting to Drought Conditions It is quite obvious that conserving water in desert landscapes, for instance in Tucson, is vital. For this purpose, a technique called  Xeriscaping is introduced. It lets you utilize various water-conserving methods. Growing drought-tolerant plants, mulching, and efficient irrigation come under the umbrella of Xeriscaping.  If you are curious to know of some alternate methods, besides the traditional irrigation system, here are some efficient water-wise irrigation methods for you. You can use the drip irrigation method, to send water directly to the plant’s roots. You can insert soaker hoses so that the water is released slowly to the roots.  You can use mulching techniques to keep the soil moist and your plants hydrated. You can collect and store rainwater so that you can use it later for watering. These methods will help you in utilizing the limited water you have to design an appealing landscape! Managing Sun Exposure in Landscaping To keep a diversified range of plant species in your landscape, you should learn to manage the plant’s exposure to the sun. Keep track of all the sun-loving and shade-loving plants, within your garden and place them in the regions they are best suited for. You may grow Red Push Pistache and Southern Live Oak or any similar trees, that are heat tolerant. These can be an excellent source of shade as they form a canopy, that can provide the shade you want for your shadeloving plants! What are the Soil Types and Preparation? The soil in Tucson is not very ideal. Most of it is ‘caliche’. Caliche does not allow water infiltration and impedes root growth.  To make this soil suitable for plantation, you need to break down this ‘caliche’.You may apply soil acidifiers, such as sulfur, to help dissolve the caliche over time, or introduce organic matter to the soil to make the soil fertile and suitable for planting. Improving Soil Quality for Planting  As the soil in Tucson lacks moisture content hence most plants are unable to either grow or sustain. It becomes crucial to bring forward a solution. Hence, comes the ‘Mulching’ technique. In this method, a layer of mulch is spread around the plants. This layer helps reduce evaporation and prevents the growing of weeds. As the soil holds sufficient moisture content, therefore it becomes suitable for plantation. What are the Water Conservation Techniques? Water plays a significant role in shaping your landscape’s beauty as it brings the plants to life. However, Tucson has very less natural water resources so it becomes a challenge to irrigate crops in the region. To deal with this problem,

Pavers Tucson

What are the Principles of Landscape Design?

Landscaping begins with an art to make it aesthetically pleasing. It ends with putting science into making it functional. Designers have to strategize, design, and manage to make it functional. Meanwhile, magnifying that landscape’s natural beauty. However, when it comes to Tucson, the deserted climate brings crucial challenges. There are some basic majors you need to take while landscaping in Tucson. In this article, we will specifically highlight the principles of design for Tucson landscaping that fits with its deserted climate. What are the 7 Principles in Landscape Design?  Here are the 7 principles in landscape design: 1. Order in Landscape Principles of design in landscaping start with the order of the landscape. The designer has to place elements in a structured manner for solid coherence and balance. In this context, the balance is either symmetrical or asymmetrical. Symmetrical balance is the process of using a mirror image on either side of a central axis. Meanwhile, asymmetrically, you balance elements naturally without exact mirroring. It gives a more calm and relaxed look. 2. Proportion On the other hand, comes the proportion. It is a basic principle in landscape design that guides the relationship between the sizes of different elements, plants, rocks, water, etc, in a particular space. The designer has to look into the space and look at how people perceive the given space. It makes the landscape more functional while not compromising the aesthetic themes. 3. Repetition and Rhythm Although, rhythm and repetition are mentioned together. But these two attributes play a dramatic role in making a functional landscape. First, repetition is a process of repeating different elements like colour, line, form, or texture to create a distinct sequence or pattern in a landscape. This involves grouping different elements to create a rhythm in the landscape. When the rhythm is created, you’ll see a flow and unity in the landscape. 4. A perfect rhythm: Unity A rhythm and repetition assemble unity in your landscape. A landscape designer has to make sure that your landscape has consistency. You can acquire it by repeating similar elements such as plant types, colours, textures, and forms throughout the landscape. This consistency of elements is called Unity. 5. Focalization Focalization is also known as the focal point. It aims to guide the viewer’s attention towards a prime feature. Designers would do it by placing the given feature at the vanishing point. This vanishing point falls between the radial and approaching lines. Besides, focalization is also named as accent, emphasis, or dominance. 6. Simplicity Since we are trying to attract the viewer’s attention to the landscape, simplicity plays a big role. It is the process of minimizing the unnecessary elements in your landscape design. Through simplicity, your design will be clearer, more uncluttered, and manageable. While it becomes functional, it also appeals to the viewer’s eyes with minimalistic landscape views and clarity. 7. Mass Collection The literal meaning of the word “Mass” is “a large group of objects”. In the mass collection of plants, designers choose different types of plants and group them together in an open circular space. In such a way, the mass plant comes together in a filmy way. They interact with each other and draw bold visuals. This process is also known as mass planting. How to create Sustainable Landscape Design for Tucson Desert Weather? As much as principles of design are important, sustainability is equally important. Therefore, you have to strategize landscaping according to the given place’s climate. Moreover, Tucson, located in the Sonoran desert, experiences hot, arid conditions with limited rainfall. Designing a sustainable landscape in such an environment requires careful consideration of water conservation, soil health, and plant selection. For a desert climate, your landscape can become sustainable by adding hardscape elements. Hardscape elements are such as gravel, rocks, and pavers. They don’t only give an aesthetic background to landscape design. But they are also functional with the desert landscape theme. Read More: How to Lay Landscape Stones: A DIY Guide for an Attractive Outdoor Space Also, using drought-tolerant plants like cacti and succulents is the best for desert climates. Your landscape will stay eco-friendly while looking equally beautiful. Low-maintenance Gardening Tips for Sustainability However, if you prefer a low-maintenance small garden, you might need to learn a few things to keep it sustainable. The best practice for a low-maintenance garden in a desert landscape is to select native plants like cacti or succulents. Moreover, you should put trees that use minimal water. You can also use low-water-use shrubs and ground covers. Furthermore, you can pair your mass collection of desert-suitable plants with the basic principles. And that’s how your garden becomes hassle-free, sustainable, and functional. Water-wise Garden Design Ideas When it’s about sustainability, water-wise gardening comes hand in hand. Water-wise gardening is a huge topic to talk about. Although, briefly water-wise gardening is also the process of using native plants. However, these native plants acquire minimal water and maintain the balance. Balance, as is the basic principle of landscaping,  can contribute to creating sustainability besides seemingly good. Moreover, this balance can restrain your landscape from further disease and pests. So, with water-wise plants, you can create an equally exquisite landscape. What are the 5 Aesthetic Design Landscape Elements? Besides, sustainability your landscape aesthetic should be top-notch. But you can’t create your garden captivating with merely a mass collection of water-wise plants. Landscape designers should consider the major aesthetic elements while landscape designing. Here are 5 of the aesthetic elements. Color Palette for Tucson Gardens Color gives life to the landscape. And it’s not about painting. It’s about arranging your plants in a sequence that creates an aesthetically pleasing look for your landscape. There are different types of shades to consider with each of your themes. It majorly depends upon your theme to decide on the color scheme. For instance, if you are going with warm earth tones, the Rust and terracotta color scheme is most relevant. It creates the natural colors of desert soil and rock

Landscape Lighting Tucson

How to Choose the Perfect Landscape Lighting?

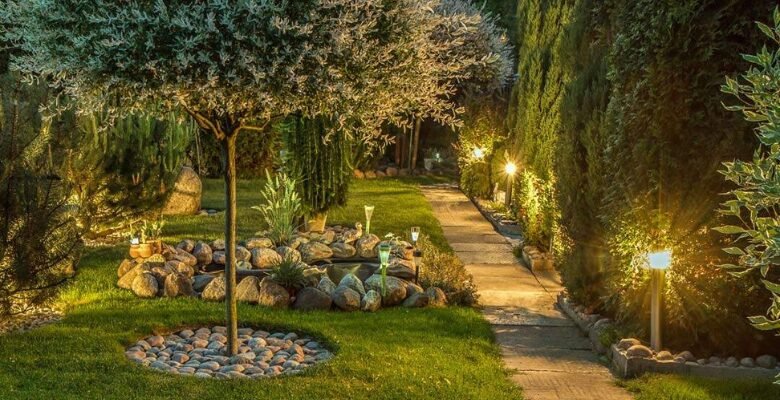
Selecting the best landscape lighting can greatly improve your outdoor areas’ aesthetic, security, and usability. Whether it’s pathway lighting, garden decoration, or light-and-shadow effects, the right garden lighting can be a decisive factor in making your outdoor area more cozy and intimate.  In this in-depth article, we will cover the most important matters and the steps to help you select the perfect landscape lighting with Legacy Landscaper, a renowned landscape design and maintenance company. What is Landscape Lighting? To begin with, we should make it clear about the meaning of the landscape lighting. Landscape lighting is the use of natural lighting installed in outdoor areas. The equipment is used to highlight and brighten up parts of the environment. Inside are gardens, pathways, trees, shrubs, architectural elements, water features, and much more. The guiding ideas are the transformation of landscapes, their good appearance, safety, and the raised functionality of the environment from early evening till late night hours. Why Landscape Lighting Matters? Enhancing the Aesthetics, accomplished by Properly placing lights to point out the beautiful plants and trees, is what makes your landscape space more visually attractive and thus the environment. Implementing lights on walkways, staircases, and even asphalt can stop disaster and establish safe travel around your property. Illuminated exteriors, on the other hand, make your home a safer place by scaring away the would-be burglars, thus making your home more secure. Landscape lighting is a solution that you can use to make sure that you continue to use the outdoor areas in the evening. A properly constructed lighting system can raise your property value by rendering it more beautiful and efficient than yours.   What are the Benefits of Landscape Lighting? Landscape lighting is a great way to class up your property. One can use lights that have the best places to make the most stately outdoor areas. These kinds of lighting can help in showing off such things as the garden, pond, sculpture, artwork, swimming pool, or other buildings. Furthermore, they can easily guide you on your path and mark the borders of the property. For a start, a luminous outdoor space leads to the acquisition of certain to-visit guests. For instance, you can plan your porch in such a way that you can enjoy a quiet night under the barely visible light of the hidden fixtures. Alternatively, you can make it like Las Vegas for pool parties on the summer weekends. However, the basis of landscape lighting is not only functional but also aesthetic. One of the uses of landscape lighting is that it makes your property safe. Dark and poorly lit areas are usually more ‘attractive’ for the unwanted guests. Thus, positioning the lighting at the right places can help in sensing the potential threats and thereby it can help in the prevention of burglary, theft, property damage, and so on. How to Increase Landscape Functionality? One of the main advantages of outdoor lighting is that it will boost the functionality of your home. When you have the proper lighting, you’ll find that you are spending a lot of time outside. The sun going down will not mean that everyone needs to go inside anymore. You would be able to view things well and to walk around your property safely, therefore you would spend more time outdoors. How to Enhance Landscape Safety and Security? A house with proper lighting is typically a safe house. A well-lit house not only looks occupied (even when you are not actually at home) but it would also put a trespasser on display if they tried to enter your property. How to Boost Your Curb Appeal? To significantly swell curb appeal homeowners should consider fitting landscape lighting, which will then raise property value too. Harness the power of outdoor lighting correctly, and you can stand out as the owner of a property that others in the neighborhood would kill for. When you want to add lights to your home, having curb appeal in mind is always a good idea. We love to draw attention to the different areas of the house that give it character during this time. Additionally, the yang influences are emphasized by the lighting of smooth flower shapes and stainless steel pipes that do not have any sharp edges or points.   What are the Steps to choose the perfect Landscape Lighting? Here are some steps that help you to choose the best and perfect landscaping lighting. Assess Your Landscape Determine the parts that are unlit in the landscape to begin with. This information might involve walkways, entranceways, drives, flower beds, water features, and, of course, various architectural features. The focus should be on finding any dark areas or spots where extra exposure could be a plus. Define Your Objectives After you have assessed your landscape, decide the main goals of your landscape lighting. Are you doing this to increase appeal, and reduce accidents or break-ins? In this way, you can be more effective when designing your lighting. Create a Lighting Plan Create a detailed lighting plan that indicates the location, as well as the type and the number of light fixtures necessary for each section. Employing a mixture of lighting styles and techniques and employing them in a way that allows for a wonderful accomplishment will help the area appear in a balanced and intelligent way. Select Fixtures and Mixtures Choose outdoor lighting fixtures and materials that not only fit your design preferences but also stay in shape while exposed to the outdoors. Admire and inquire about the quality, colors, and energy consumption of each lamp. To make sure that you choose great lighting options from your end during our consultation, we at Legacy Landscaper will discuss your specific needs. Install and Test Make sure that you have read actually and followed the instructions of the manufacturer before you start installing the lighting fixtures. If you feel that you are not up to doing electrical work either read about it, start with something easy like replacing a

Landscaping design in Tucson

How to install landscape lighting?

Adding landscape lighting to your property is about more than just the appearance; it largely contributes to the safety and value of your home. Whether it is the perfect serenely glowing paths or the fascinatingly stark highlighting of your home’s architectural details, these lighting fixtures change, not only the yard area but also the security and safety it offers users after sunset. As a legacy landscaper who has been in the field for a long time, we have put together this complete guide to assist you in the correct landscape lighting installation. These pro tips are guaranteed for a successful project from the beginning to the end, implementing the proper skill towards installation. Keep reading this blog to not only no the tips but also understand how to plan your landscape lighting. How to install Landscape Lighting? Installing landscape lighting consists of a variety of stages – such as developing a plan, selecting fixtures, and wiring, and doing the final testing to make sure that it works as planned. Although it may look like an impossible task, the whole phase can provide you with a satisfaction that is immeasurable as well as give you a whole new way to see and enjoy your outdoors.  At a fundamental level, the main reasons for a well-designed landscape lighting system are:–  Increased Curb Appeal: Highlight the best parts of your house and make it the most noticeable one in the neighborhood. Safety and Security are Increased: The well-lit paths and the entryways also help reduce the possibility of intruders as well as slipping accidents. An extension of Outdoor Living Space: Stay later in your yard and have fun whether for entertainment or relaxation. Landscape lighting is indeed an additional but at the same time, it is a highly functional unit that makes your space more beautiful and more usable both day and night. By correctly planning the tools and the specific requirements of the landscape, you can easily achieve a captivating outdoor space within no time. How to Plan your Landscape? For a project that wants to go on a slope with lights, the most important element to be sure of success is the careful planning and rational drafting of the project. This section will help you define, place, and establish the layout for your landscape lighting so that you can get the most both functionally and visually out of it.   Design: Visualizing Your Space Imagine your backyard at night when you sit in the garden to relax. The feature you are most concerned with needs to be taken into consideration before the rest such as trellis, porch, fountain, etc. Develop a peaceful vibe by the use of subtle lighting for a peaceful and relaxed environment or put some glowy lights up if you prefer the security and can see everything outside. Positioning the Right Fixtures Plot out the space each light is meant to occupy. This includes establishing distances between lights, specifically in the case of pathway lights, where regular brightness is of the highest importance. Incorrect positioning such as the distant location of the light fixture from one another can result in shadow areas. Plan the Electrical Setup Choose whether you are going to use low-voltage (12V) or line-voltage (120V) lighting systems. Low-voltage systems are generally a much safer and simpler task to complete the installation and they are perfect for DIY projects. Line-voltage systems in some cases need professional handling because of the high risk. Calculate Power Requirements Firstly, supply to the store, all the power requirements for each respective lighting system for the standard they are providing, then select a transferring station. Transferring a transformer changes the standard 120V domestic current to the 12V required for low-voltage systems. Be sure that the combined wattage of all your lights does not surpass 80% of the transformer’s capacity to prevent burnouts from happening. How to Choose the Right Landscape Lights? It is quite important to pick the right landscape lighting to make sure that it looks good and also, it works properly. Here’s a breakdown of the different types of lights and their best uses: Types of Lights Solar Lights: They work in sunlight and no wiring is necessary to install them, which makes them the simplest to install. They’re perfect for areas that get plenty of direct sunlight. But, their output may not be as strong as the other choices. Low-Voltage Lights: These lights are the best choice for saving energy and safety while installing. They might just be a little lower in power than the others. They need a transformer to convert home power to a lower voltage, but this setup allows for more illumination. Spotlights: Appropriate lighting is the easiest way to bring out the beauty of trees in your yard. They move in the same direction as the beam and the decision on the focal points is upon you. Floodlights: Designed for applications like carports or lawns which require solid exposure to light across big areas, are some of the types of these lights. Their broader light beam helps them successfully illuminate large areas and therefore are very useful for driveways and backyards that need white light coverage. Path Lighting: They are a set of small, usually round, but occasionally columnar posts or fixtures. These lights are placed along a path or on the sides of steps to brighten the way for pedestrians and add an emotional touch to the space. What are the Tips for Perfect Landscape Lighting? Here we have discussed some of the most trendy and essential tips that are required by beginners. Focus on Key Features If viewers pay attention to the specimen trees, water features, or architectural details in your landscape, they will most likely think of those as the most impressive ones at the beginning. Make use of spotlights or well lights to put these features in the spotlight and create a visual interest in them. Use Layers of Light Add several types of lighting in different areas of the

Tucson Climate Factors

How to Landscape a Steep Slope on a Budget

Your yard provides its pocket of paradise. You have various options for creating a one-of-a-kind landscape but learning how to landscape a steep slope on a budget might take time and effort. Where should you start? The hardest part of the job is when you are dealing with a steep slope and you have a very tight budget. But it is something that is not impossible to do! You just need to be more creative and think the operation through. Certainly, you can convert this strenuous area into a magnificent and accommodating part of your yard. You should not spend more just for the look of your garden. How to install Landscape on uneven Ground? On a large slope or hill, there are several factors, such as soil erosion and the continuing need for maintenance, that are causing a headache. Fixing these problems in your garden will take some time and money, but you still have to be careful about the visual appearance of your garden. Making a grade into a more manageable one is usually so much more difficult than telling it is. That’s the reason it’s good to start any terrain job on a false field with prudential measures. Here are some tips on how to redesign a steep hill and make it a chic focal point of your yard. What is Landscape Slope? The first thing you should do when you are designing a near-vertical incline is to understand what it contains that makes it different from others. Factors like the steepness of the slope, the type of soil and its quality, the water and sun, in short, the irrigation pattern, must all be set in place. Furthermore, you need to take into account potential drainages as well as other environmental aspects that may hinder your work. Check the Slope: Prove that the slope is steep. In case it seems difficult, measure it with the help of a tape and a friend. Examine the Soil: Knowing which type of soil (sandy, clay, or loamy) the place where you will be planting, will entail what you should then plant. Observe the Water: Look at the way the water moves during the rain. This will aid in managing drainage and erosion prevention. How to Create a Design Plan? Note that things such as the kind of drainage solutions required and the transportation charges besides the price of materials and labor when coming up with your scheme are crucial. What is the main function of space- Is it just for beauty or is it something else? Examine all available options for possible drainage problems originating from irregularities in the ground. Sustain a creative frame of mind through proposals that suit one’s budget and do not jeopardize the stillness and order needed for relaxation. Look their way and scrutinize the types of plants, grasses, trees, and shrubs that will grow in good conditions like temperature, soil, and climate making sure that the resources are properly spent and it is not a toll on your wallet. As soon as you have cultivated the idea of the project, you will have to concentrate on shopping for materials in a budget section.   How to Create Terraces? Another method of good land use is to make the terraces in such a way that there are switchbacks along the steeper slopes. While the process of hiring contractors for terracing is quite expensive, the installation of budget-friendly DIY models presents another opportunity. DIY Retaining Walls: Pick up reclaimed items from the local internet marketplace to build DIY retaining walls. Just try to remember the materials. They can be wood, stone, or concrete blocks that are strong and inexpensive. Natural Terraces: Straight-up cut the ground to make a level foot. Put the soil in order by planting the plants and mulch. Gradual Steps: These narrow easier-to-build terraces turn out to be the best solution over mass terraces. It’s less tough in terms of labor, however, it still drains your pocket very quickly. How to Shop on budget? If you find yourself on a tight budget, you can save money on landscaping the steep slope by examining cheap products and sales of garden supply stores. You can usually find economical and quality plants at nurseries, farmer’s markets, and also online shops. Before you acquire any item, look up the clearance section; that gradient can hold some jewels inside it. If you need an economic solution for your soil cover, the first idea is to visit a local garden store or a DIY store that sells the most affordable soil modifications. On a side note, do not forget to use a few upcycling materials that you have at home, for instance, reusing old bricks or stones for creating a wall or a terrace area. This way, you will end up with a great result on the one hand and you will not have to purchase many new materials on the other. The first thing that you should do is, double-check if the plant you are planning to buy needs that kind of environment where you can set it. Pair full sun plants with full shade slopes, choose drought-tolerant plants for low moisture places, and make sure all the plants can endure your area’s low temperatures if necessary. How to Choose the Right Plants? After collecting your low-cost materials, it would be high time to decorate the plants and cover your slope with them. Tree planting is the best method for stabilizing the soil, minimizing soil erosion, and also providing shade aerosols. If you have the means to afford it, opt for the greenest and most beautiful shrubs or trees. Which things you intend to give birth to will match your monetary situation best, weigh. So, air comes up as a green idea. Ground covers such as clover, thyme, or periwinkle can also help keep weeds away while still being eye-catching. When placing plants and ground cover, make sure they are equally distributed across the space so there are

Tucson Artificial Services

Landscape Ideas for Creating Privacy

Would you like to plant some flowers and bushes to add tranquility to your outdoor space? If so, we can help you! Building a private sanctuary in the backyard increases outdoor living space and offers a peaceful entertainment center that allows relaxation. Whether you are a city person, who prefers a bustling urban lifestyle, or a more reserved person who lives away from the city, the privacy of landscape design can be achieved in many ways and through various elements. There are various ways to get your piece of heaven from establishing privacy in nature such as building human space plants to cultivate the park. The options are endless, from the green walls built with shrubs, vines, trees, and other plants to adding benches, arbors, or pergolas made of wood or stone. Here are ten landscaping ideas for privacy in 2024, which you can use to create a private space and a garden with a perfect look. Natural Privacy Screens Hedges and Shrubs Making the privacy of the backyard is through the classic method. By doing the hedges and bushes, people can create the privacy they are looking for. The plants that stay green all year round such as boxwood, yew, and arborvitae are several such choices because they keep their foliage all year long. They can be pruned to any desired height and shape, making a thick barrier that is very effective in preventing views and reducing noise. Spring-blooming shrubs like hydrangeas or lilacs can ensure visual interest in season and at the same time maintain your privacy. Trees Planting trees at strategic locations is the best way to get not only a vertical but also a horizontal shield. Fast-growing trees like Leyland cypress, Thuja Green Giant, and hybrid poplars grow so fast and can make a natural barrier only in a few years. In addition to this, the deciduous trees that have dense foliage can also be used like maples or oaks. The use of different trees is a good idea to create a visual impression of privacy throughout the year. Fences and Walls Wooden Fences Wooden fences are a very traditional way of making some private space. There are many types of fences, some are full-panel fences and others have lattice tops. A full-size panel fence can be used to block out people completely as it is solid while a lattice top fence is a compromise between privacy and airflow. Coloring or painting the wood with protective layers of paint or staining can directly affect the aesthetic quality and longevity of the wood. Bamboo Fences Bamboo is a modern and green decision when it comes to fencing. It shoots up super fast and can make a reaching screen fairly rapidly. By the way, these bamboo fences not only have a special look to your landscape but also function as a shield against the strong wind. Stone Wall For a more lasting and solid solution to privacy, a good idea would be to use a stone wall. Stone walls are not just functional pieces in a garden but also add a touch of majestic grace and ageless relief to your environment. Any individual can build them using a wide range of some of the most inexpensive materials like fieldstone to more expensive and more quality materials like cut stones depending on your preferences and choices. Panels and Pergolas The most basic way to add privacy within specific areas is by using pergolas combined with panels or privacy screens. You can install a prefabricated iron gazebo or use pergolas to transform seating areas. Place a fence of lattice panels on three sides or let the greenery hanging from the wall do the job to make a few discreet living reprieves. To make the space more private, you can install curtains, a trifold screen, a hinged screen, or a decorative screen around the pergola. If a pergola is the option with a lattice panel then enable the vines to populate the panel which gives a privacy effect and also a nature theme.   Trellises and Screens Trellises A trellis is a design that functions on its own or can be attached to fences and walls. These gardening accessories sustain flowers such as ivy, morning glory, or the climbing hydrangea forming a natural green wall. They can be crafted out of various materials such as wood, metal, and composite, giving you the option to choose a piece that would match the overall vibe of your garden. Freestanding Screens The free-standing zone that is built from wood, metal, and composite materials can be put in a specific place in your garden to stop the view and make a private area. These shades are expected to be plain or they will be embellished with accessories with an artful look; therefore, they will feature angles, curves, squares, and the like but they will also add a playful element due to a twist in their creation process. Planting Berms A berm can be an artificial heap that is made up of soil that is constructed to give a relief effect on the ground and change its profile. The same thing can be achieved by growing shrubs, trees, and perennials on a berm, therefore creating a natural privacy screen. Besides, berms serve as drainage channels which, if not, could become drains of aesthetic appeal in a monotonous environment.   Water Features Water features such as fountains, ponds, and waterfalls are the new and elegant design elements that grab the sweet essence of nature. Ideal for both relaxation and for providing some privacy, pond-less water features are a beautiful distraction that will grab your attention and take your mind off the hassles of your everyday life.  The soft sound of water that is running in the background adds an auditory layer of relaxation allowing for the feeling of being in a private and quiet garden. Outdoor Structures Gazebos and Pavilions Gazebos and pavilions come in the form of these stand-alone moods, which allows us a quiet hideaway

Landscape Tucson

How to Lay Landscape Stones?

Who doesn’t love adding beautiful touches to their outdoor space? Laying landscaping stones gives tempting aura to your garden environment. You just need to learn how to lay landscape stones with right techniques. It will maximize the functionality of your landscape stones meanwhile making it seem aesthetically pleasing.  Although, before you question how to lay landscape stone, you first must know what types of stone you could use. There are gravels, river rocks, granite, pebbles, and many more. The options are endless. You should decide on the type of rock that will suit your aura. In this DIY guide, you will get a walk through on installing decorative stones by making it effective and aesthetic.  How to Draft your Landscape Stone Project? To assure that your landscaping stone project is effective, you start with drafting a plan. Legacy Landscaping and Design in Tuscon will be your best help for the project.  You will start analyzing your space and then deciding on the way you will design landscaping area. You will need to draft the area on pencil and paper.  There is no need for you to be an architect or sketcher to create a blue print. You can do it with drawing some random lines that would make sense to you.   How to Clean the Dirt and Plan your area? Once you have your blueprint ready, you start your project with getting rid of the dirt. If you are installing garden stones in your lawn area, there might be some broken mulch there. Here are easy steps to follow, You can also use level tool to measure the space or deciding either if the laying of stones will be vertical or horizontal. How to Install soil base or fabric and decide Stones Quantity? Enough with the planning, now dig the area from top soil which you have marked with measuring tape. The digging area depends upon the type of your stone. For small stones, 4-6 inches deep is suitable and for larger rocks, 6-8 inches are good. Then plod the exposed soil so it will become compact. Now install a soil base. Make sure to choose the soil with good drainage, a lot of organic matter, the right type, and according to your soil type.  You can also lay out the landscape fabric. It act as a boundary between sub grade and landscaping stones, so that your stones won’t sink in the sub grade.  Cut the X-mark on the spaces where you want to put a plant. Then carefully place your plant if you want to.  Also, install landscape edging if you think your decorative stones will fall of the boundary of your landscape. It gives a more finished and functional look. After installation of base, it’s time for deciding on the aesthetics of your landscape. As told before, you can decide of several types of rocks incluing gravel, crushed granite, black pebbles, river rocks etc. Make sure to choose the one that matches the ambience of your space. How to Install Weed Controller or Use Weed Preventing chemicals? Once you have decided on your aesthetic, pay attention to preventations. Weed can knock down the whole mood of your chilling space. Therefore, lay a week controller fabric over the soil. It keeps the weed under control and avoid the annoying small growths. Nevertheless, if you aren’t liking to use a week controller fabric, you can use a weed preventing chemicals. You spray the chemical available in market on the installed soil.  Al though, you use the weed preventation techniques, you will need once every now and then to pick out the growth of weed in your rocks. The growing weeds are inevitable and there is no maintenance free option, so make sure to keep checking your beautifully designed area.  How to Lay your Landscape Stones? Now your soil is ready and weed prevented, it’s time for your favorite step. Finally, you can lay your decorative landscape stones now. But first, have your ordered your truck loaded of your desired rocks?Use a spade to fetch the rocks into wheel barrow. It’s a boring and tough job but do it anyways.  Now, fall out your rocks into your desired area. With a use of garden fork you can spread all the stones around your landscape. The ideal length for the landscaping stone is 2 to 3 inches but you can decide it yourself for how much you want to lay. It also depends on the inches you have dig in the previous steps.  How to Add Finishing Touches? Once, you have install rocks, it might still not look pleasing. That’s because of the extra sand or dirt and obnoxious gaps between stones. First, the gaps between rocks look incompleted, so you can use polymeric sand to fill the gaps. Or you can also use crushed gravels that will create a stability. Also, spray the rocks with a water stream to clean the dirt off the rocks. It will be a satisfactory process and removes excess material. With the water, you can see the sand coming off and the variation in the actual color of the rocks. Also, watering will also help your replaced plants get refresh. You will have clean, attractive and finished surface. Conclusion The process of how to lay landscaping stone is straightforward but backbreaking. So, make sure you start with a clear mind and interest. From drafting your project area to adding finishing touches, you should do it with your heart.  And once your landscaping stones are decorated in your outdoor space, keep risening the space every once. Also, keep plucking out the weed growth regularly. You just pull them out with your hand and it comes out effortlessly.  Keep these safety majors in check every once in a week. So, you can have sustainable, clean and alluring stone outdoor adjustment for a long time.

Landscaping design in Tucson

Can Pavers be Painted?

Painting pavers has become a vast DIY trend to enhance its beauty. But, can pavers be painted? Is it the greatest option for resurfacing your paver patios? If you want to give your pavers a new appearance, you have landed on the most accurate blog! Sometimes just because a decision is popular does not mean it is the best one. We’ve seen several installs go wrong because of poor decisions – nothing in the hardscape industry is as straightforward as it appears. Pavers are a popular choice for outdoor spaces like patios, walkways, and driveways due to their durability and aesthetic appeal. Even the most attractive pavers will begin to look worn and outdated over time.  Many people opt to paint them to give their outdoor areas a new lease of life. Can you paint pavers? Continue reading as we discuss this topic—its advantages and disadvantages, as well as the steps involved. Can Pavers be Painted? The short answer is yes! The majority of individuals make a decision to paint pavers because they are unhappy with their present appearance. This may be attributed to several factors such as losing color from being exposed to sunlight or looking old among others. In the case of that occurring, the initial idea that strikes our mind when we think about improving their appearance is painting. However, it’s important to note if pavers can be painted. Well-maintained pavers should last for many years. From overall experience, we have learned that more often than not they can look new again and even regain their former color simply by cleaning and sealing them. Having said this, painting should only be considered if as a homeowner you feel uneasy with the kind of colour they have and you wish to have a different one. If it’s your goal then painting is the best option.  Why Paint Pavers? Brick, cement, and concrete pavers are popular design components for landscaping and outdoor spaces. Pavers may be used in a variety of ways throughout the yard, including sidewalks, seating spaces, gardens and flowerbeds, and fire pits. Pavers begin to seem dated with time, and many homeowners determine that theirs require replacing.  Below are some reasons why you should paint pavers. Cheap Remodeling:  To renovate pavers can be very expensive. As a result, painting them offers a cheaper option which gives similar amazing results. Customization:  One is allowed to be very creative when painting since there are no limitations to colors that can be used nor are there strict rules to be followed when it comes to their application. Aesthetic Value:  Most homeowners prefer painting bricks just so they may have an appealing look. This may be necessitated by the need for change or the fact that some stains cannot be washed away thus prompting an individual to cover them using paint. What are the Advantages & Disadvantages of Painting Pavers? Ever thought about painting your pavers? This can be a fast change without moving them or laying new ones. Just cover the old ones with paint! But if it sounds too good to be true, that’s because it is. Paving bricks are made to absorb water, not hold it. So if you coat them with paint they will be slippery when wet. Besides, their porousness creates unevenness in painted layers – multiple coats may not help. Most paving stones have joint sand between them and you may not be able to cover the sand using paint. It may take a lot of time to paint and install the pavers singly and you then fix new sand. So, for someone who needs a quick project to improve the general look of the backyard, this might not work well for you. Additionally, remember that paint can be affected by the sun hence fading. The coloring of your current paving bricks is all through since this depends on their method of manufacture. The initial brick color may start coming out once your paint wears off or fades. Therefore, do not expect to get your desired color shade after painting. What are the Steps to Paint Pavers? Pavers can be difficult to paint, and painters are aware of the difficulty they face while adequately painting pavers, so they do not chip, peel, or lose saturation. Here are the four essential steps to paint pavers. Getting the Pavers Clean To get started with painting, make sure to weed out everything first, then clean with dish soap and a scrub brush to remove any dirt remaining on the paver from tough stains. After scrubbing, rinse and let dry completely.  Prepare Your Pavers After cleaning and drying off the pavers, prep them next. Apply concrete primer on the pavers and let them dry completely after every concrete primer coating has been applied. This is an important step that ensures paint longevity. It’s important to prepare any type of pavers for painting by providing the right surface for it, be it clay or any other construction material used. Painting the Pavers To paint the pavers so that they last for years is important to choose the correct kind of paint. After you are done with painting the pavers, wait for them to dry before applying the sealer. Seal the Pavers Sealing through cracks and crevices, ultraviolet rays break down the binder in concrete surfaces which leads to surface spalling (frosting or scaling) when they freeze. All articles should be sealed immediately after installation using an acrylic content vacuum or chemical grout sealer. How to Choose the Right Paint for Pavers? Different kinds of paint are made for different surfaces. For example, the paint you use on your brick pavers should be UV-resistant, fade-resistant, slip-resistant, and designed for outdoor use. Consider looking at paints made for concrete or outdoor tile; this will help guide you in the right direction. Do not use indoor paint for this project. It will not hold up. Spray painting is fast but will require many coats to cover adequately. Costs can quickly add